nextjsとは何か

nextjs は react に基づくフルスタック SSR(サーバーサイド レンダリング)フレームワークであり、react
の自動設定に関連付けられた一連のツールを提供します。これにより、我々はアプリケーションの構築に集中でき、設定手順を簡略化します。

もう一回お願いしますが、もっともそれで問題が解決しなかった場合、引き続き質問をお願いします。

サーバーサイド レンダリング(ssr)とは何か

spa

サーバーサイド レンダリングについて話を持ってみましょう。spa(単一ページ アプリケーション) と言えば、react や vue
がその例です。これらは、クライアントに js をダウンロードさせ、
コンパイル、ビルドしてから、js 仮想 dom オブジェクトを作成し、一度に index.html にmount(マウント)する手法を取ります。たとえば:

spa アプリは、index.html ファイルを提供し、そこに指定された id を持つ div タグが含まれています
次に、spa の入力 js によって、プログラムをレンダリングし、指定された div に mount する

他のすべての変更は、それに基づいて行われます。だから、これらは単一ページ アプリケーションと呼ばれます。
そして、spa アプリは、レンダリングとロジック処理を行う js ファイルをクライアントに置き、クライアントがレンダリングを担当するため、csrc(クライアントサイド
レンダリング)アプリとも言えます。

一方、サーバーサイド レンダリングは、サーバーが html ファイルをレンダリングしてクライアントに渡す手法です。異なる要求に応じて対象の
html ファイルを返す。

比較

  • パフォーメンス
    csrc はクライアントにレンダリング任務を任せ、性能の悪い機器に対してはグlitチな動作を示すため、サーバーの負担は軽減されます。逆に
    ssr は、リクエストの尖鋒時に大量の要求を処理するため、大きくなる壓力を逃れませんが、クライアントの負担を軽減する。
  • seo 友好性
    クライアントサイド レンダリングは、レンダリング前に web ページジョンスピーフィックに詳細な情報を得るのは困難であり、seo
    に対して友好的ではないが、サーバーサイド レンダリングは、レンダリング済みのファイルを検索エンジン
    スpiderに渡すため、この時点でのページジョンスピーフィックが基本的に完全であり、エンジンのアルゴリズムによる分析と認識を容易にする。
  • 初回ロードタイム
    csrc は js をクライアントにダウンロードさせてからレンダリングするため、js
    がクライアントにダウンロードされるまでの間、空白の頁を見る可能性があります(最初の画面表示問題)
    一方、ssr はサーバーで html をまずレンダリングし、このステップを省略し、クライアントの負担を軽減するため、ユーザーに迅速にコンテンツを表示できます。

nextjs プロジェクトのセットアップ

gitリポジトリ

本文の教育内容は github リポジトリに保管されており、学習の際に参照できます。異なるブランチには異なる章が対応します。

プロジェクトを作成する

1
2
3
4
5
npx create-next-app@latest next-course
# or
pnpm dlx create-next-app@latest next-course
# or
pnpm create next-app

私のオープンソースプロジェクトを使用して作成する

機能1: ファイルルーティングシステム

Next.js 13では、React Server Componentsに基づいて新たなApp
Routerが導入されました。このRouterでは、共有レイアウト、ネストされたルー、ロード状態、エラーハンドリングなどをサポートしています。

Next.js は自動的に app ディレクトリ内の page.jsx/.tsx
ファイルを認識し、ページを作成すると共に、親ディレクトリか同じ階層の layout.jsx/.tsx ファイルをレイアウトとしてレンダリングします。

試してみましょう

ブログサイトを作成すると仮定します。サイト内のブログへのアクセスパスが site.example/blog/test/
というものであるとき、こんなディレクトリ構造を作成してみましょう。

1
2
3
4
5
6
- app
+ blog
+ test
+ page.tsx
- page.tsx
- layout.tsx
jsx
1
2
3
4
5
6
7
8
9
// app/blog/test/page.tsx

export default function TestBlogPage() {
return (
<div>
Hi, there is a blog page!
</div>
)
}
app/page.tsxファイルに、それへのリンクを追加してください
jsx
1
2
3
4
5
6
7
8
9
10
11
// app/page.tsx

export default function Home() {
return (
<div>
<a href={'/blog/test'}>
Go to test blog
</a>
</div>
);
}

起動させてください:

1
2
3
npm run dev
# or
pnpm dev
ok, デフォルトのcssスタイルのため、見た目が少し変なようです
globals.css内の内容を編集して、背景をきれいにしましょう。
1
2
3
4
5
:root {
/*--foreground-rgb: 0, 0, 0;*/
/*--background-start-rgb: 214, 219, 220;*/
/*--background-end-rgb: 255, 255, 255;*/
}

效果

トップページ
トップページ
「Go to test blog」をクリックしてください

Ok, この挑戦に成功しました!

ルーをURLへのマッピング

先ほどの例からわかるように、ファイルとルーの間のマッピング関係は次の通りです:

file://site.dir/app/a/b/page.jsx -> site.example/a/b

動的ルー

あなたはもしかしたら、現在のURLがハードコーディングされていることに気づくかもしれません。10ページ分異なるブログページが必要とする場合(たとえばblog/test2,
blog/abc, blog/startなど)、この方法では10ページ分のxxx/page.js/jsx/ts/tsxを手動で作成する必要があります。時間がかかり、效率的ではありません。

もちろん、Next.jsはこれを解決するための動的ルー機能を提供しています。

そのファイルルーのマッピングは次のようになります:

file://site.dir/app/blog/[slug]/page.jsx -> site.example/blog/a, site.example/blog/b, site.example/blog/c

試してみましょう

私たちのディレクトリ構造を編集してください。

1
2
3
4
- app
- blog
+ [slug]
+ page.tsx

ブログの内容ページを作成します。

jsx
1
2
3
4
5
6
7
8
9
10
// app/blog/[slug]/page.tsx

export default function BlogPage() {
return (
<div>
{/*生成随机数*/}
blog {Math.round(Math.random() * 10)}
</div>
)
}
ブログ/aにアクセスすると、私たちの [slug]/page に到着しました
もし先ほどのblog/test/pageを残していれば、それが引き続き有効であることがわかります

レイアウト

Next.jsはレイアウトファイルを提供し、複数のルー間で共有されるUI機能を果たします。ナビゲーション時には、レイアウトは状態を維持しながら対話型を保って再描画しません。レイアウトはネスト可能でもあります。

レイアウトファイルを分析してみましょう。

jsx
1
2
3
4
5
6
7
8
9
10
11
12
13
14
15
16
17
18
19
20
21
22
23
24
25
26
27
import type {Metadata} from "next";
import {Inter} from "next/font/google";
import "./globals.css";

// これはフォントで、暫定的に気にしないでください
const inter = Inter({subsets: ["latin"]});

// ページのメタデータを提供します
export const metadata: Metadata = {
title: "Create Next App",
description: "Generated by create next app",
};

export default function RootLayout({
children,
}: Readonly<{
children: React.ReactNode;
}>) {
return (
<html lang="en">
<body className={inter.className}>
{/*childrenはサブディレクトリの内容である(サブディレクトリのレイアウトとページを含む)*/}
{children}
</body>
</html>
);
}

ナビゲーションバーとフッターバーを追加しましょう。

jsx
1
2
3
4
5
6
7
8
9
10
11
12
13
14
15
16
17
18
19
// components/footbar.tsx

export default function Footbar() {
return (
<footer className={'bg-gray-200 border-b border-b-gray-300 border-t border-t-gray-300 sticky h-20 w-full'}>
footbar
</footer>
)
}

// components/navbar.tsx

export default function Navbar() {
return (
<nav className={'bg-green-200 border-b border-b-gray-300 sticky w-full h-20'}>
navbar
</nav>
)
}

まだtailwindcssを学んでいないかもしれません。この記事をご覧ください(todo)

それらをlayout.tsxに追加してください。

jsx
1
2
3
4
5
6
7
8
9
10
11
12
13
14
15
16
17
18
// app/layout.tsx
///
export default function RootLayout({
children,
}: Readonly<{
children: React.ReactNode;
}>) {
return (
<html lang="en">
<body className={inter.className}>
<Navbar/>
{/*children就是子目录里的内容(包含子目录的layout和page)*/}
{children}
<Footbar/>
</body>
</html>
);
}

効果:

ブログの内容を提供する

OK、今は異なる名前をマッチングすることができる動的ルーを持っており、ナビゲーとフッターも作成しましたが、私たちはページにより多くのコンテンツを表示することを望んでいます。

Markdownを書く

多くのメモ帳ソフトウェアはMarkdown構文をサポートしており、個人的には好んでいる方法です。現在、多数のnpmライブラリーはMarkdownファイルの内容をHTMLの富文本文字列に解析することができます。

Markdown構文を学ぶ?

ディレクトリ構造を変更してください

1
2
3
4
5
6
- app
- ...
- contents
- mountain.md
- bird.md
- flower.md
mountain.md
1
2
3
4
5
6
7
8
9
10
11
12
13
14
15
16
17
18
![](https://cdn.pixabay.com/photo/2022/10/24/12/20/mountains-7543273_1280.jpg)

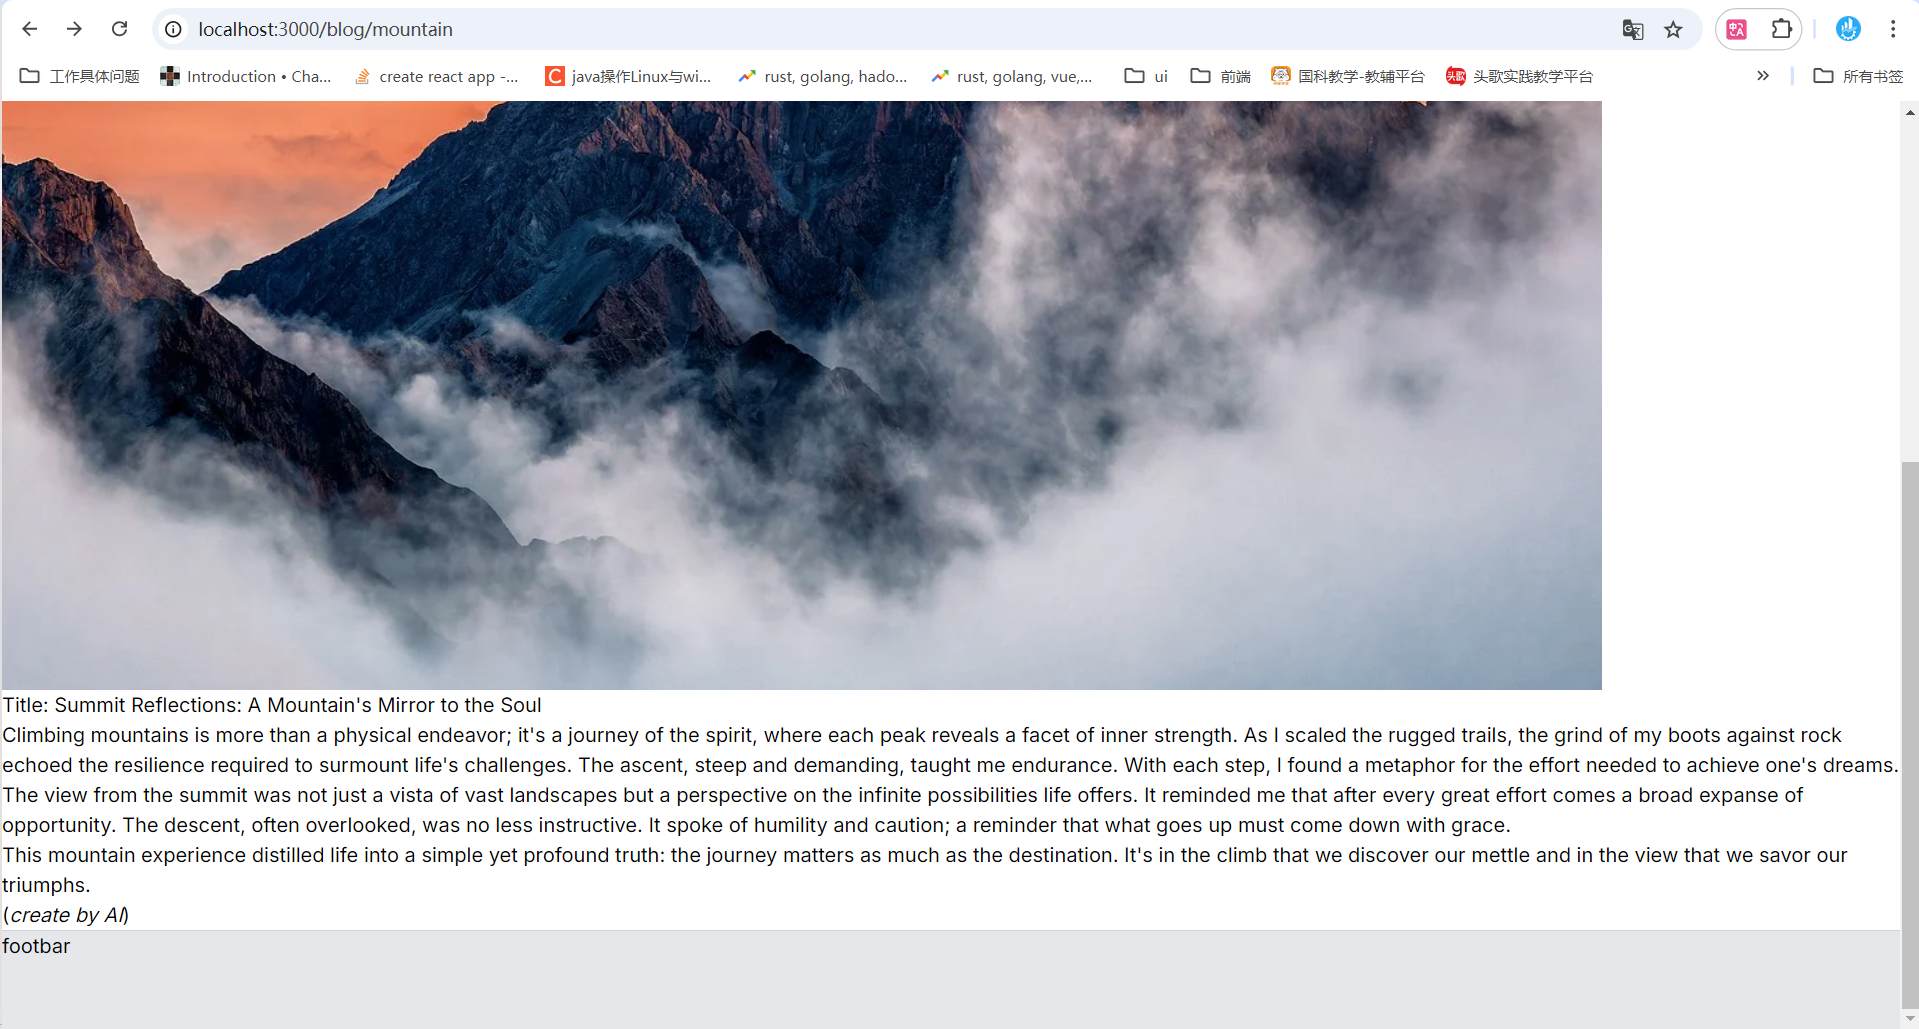
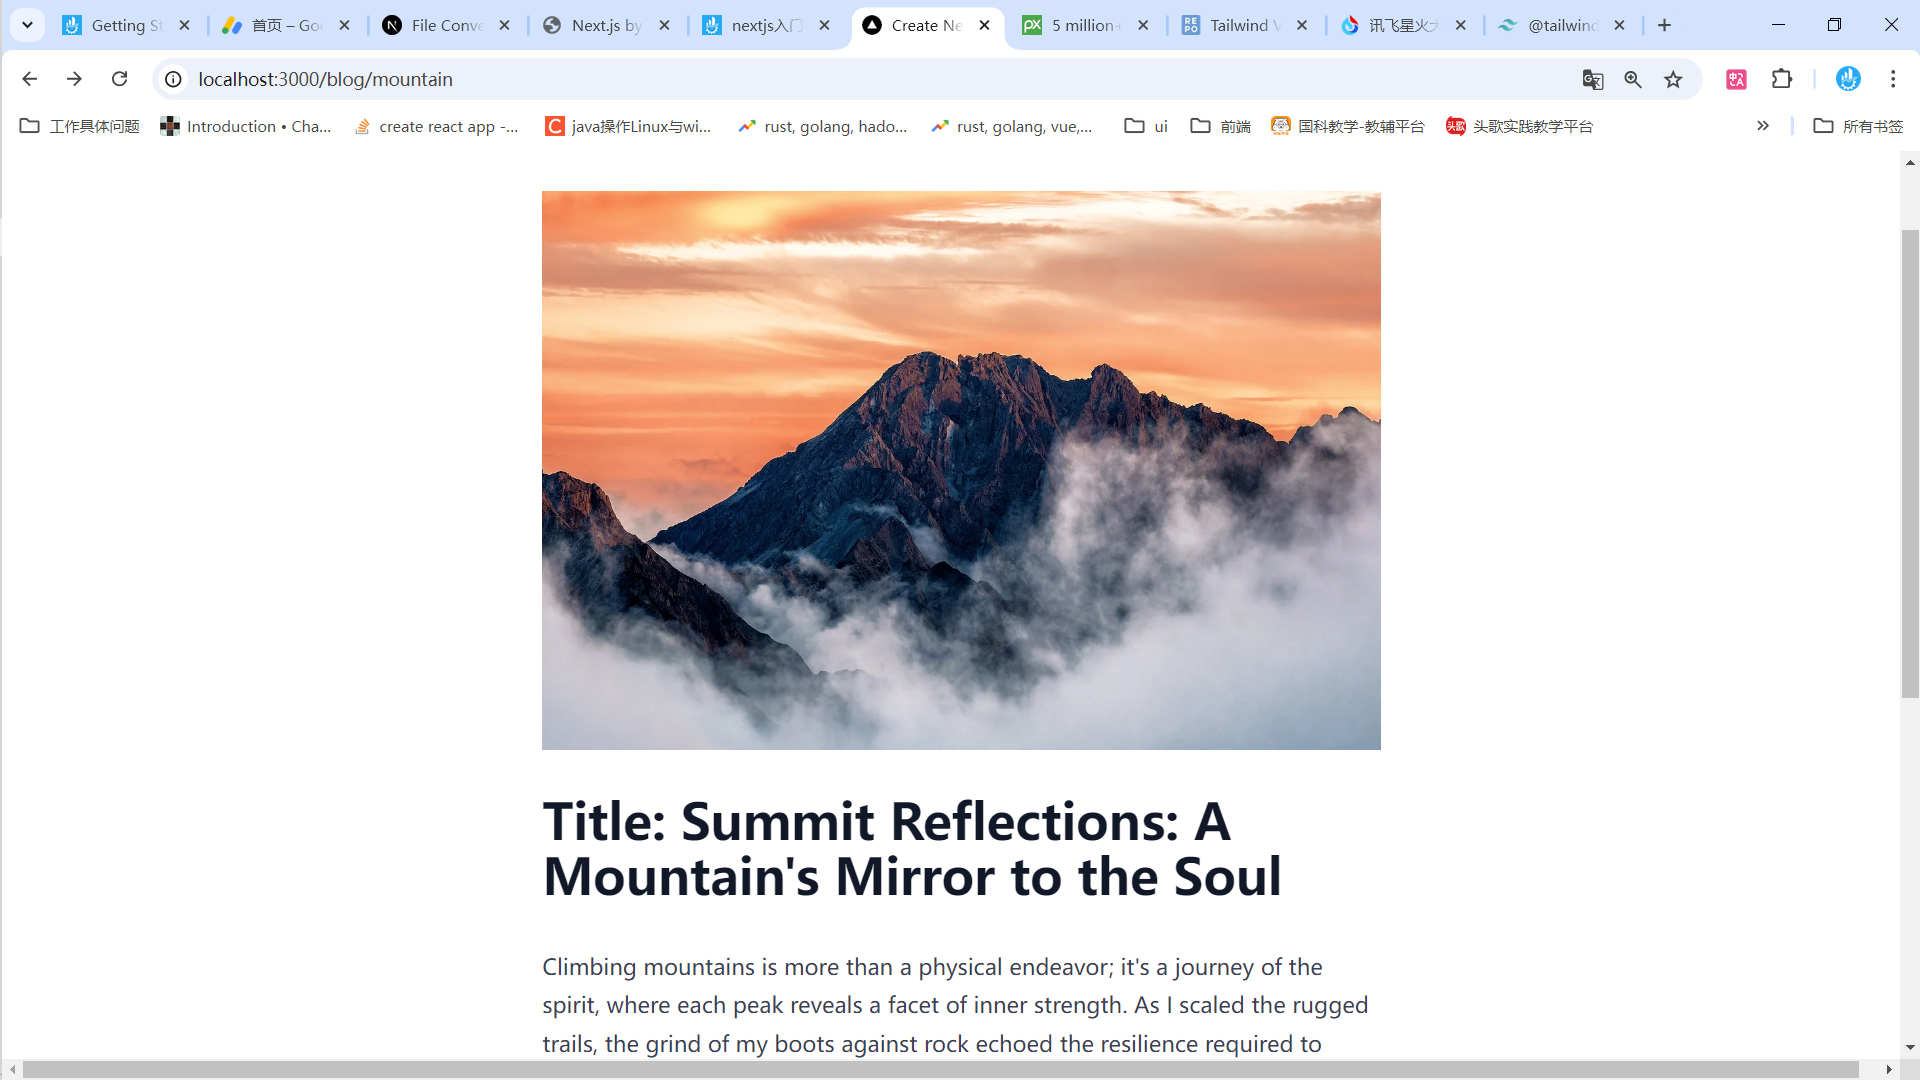
# Title: Summit Reflections: A Mountain's Mirror to the Soul

Climbing mountains is more than a physical endeavor; it's a journey of the spirit, where each peak reveals a facet of
inner strength. As I scaled the rugged trails, the grind of my boots against rock echoed the resilience required to
surmount life's challenges. The ascent, steep and demanding, taught me endurance. With each step, I found a metaphor for
the effort needed to achieve one's dreams.

The view from the summit was not just a vista of vast landscapes but a perspective on the infinite possibilities life
offers. It reminded me that after every great effort comes a broad expanse of opportunity. The descent, often
overlooked, was no less instructive. It spoke of humility and caution; a reminder that what goes up must come down with
grace.

This mountain experience distilled life into a simple yet profound truth: the journey matters as much as the
destination. It's in the climb that we discover our mettle and in the view that we savor our triumphs.

(_create by AI_)
flower.md
1
2
3
4
5
6
7
8
9
10
11
12
13
14
15
16
17
![](https://cdn.pixabay.com/photo/2023/03/19/05/31/flower-7861942_960_720.jpg)

# Title: Blossoming Insights: A Whiff of Flowers

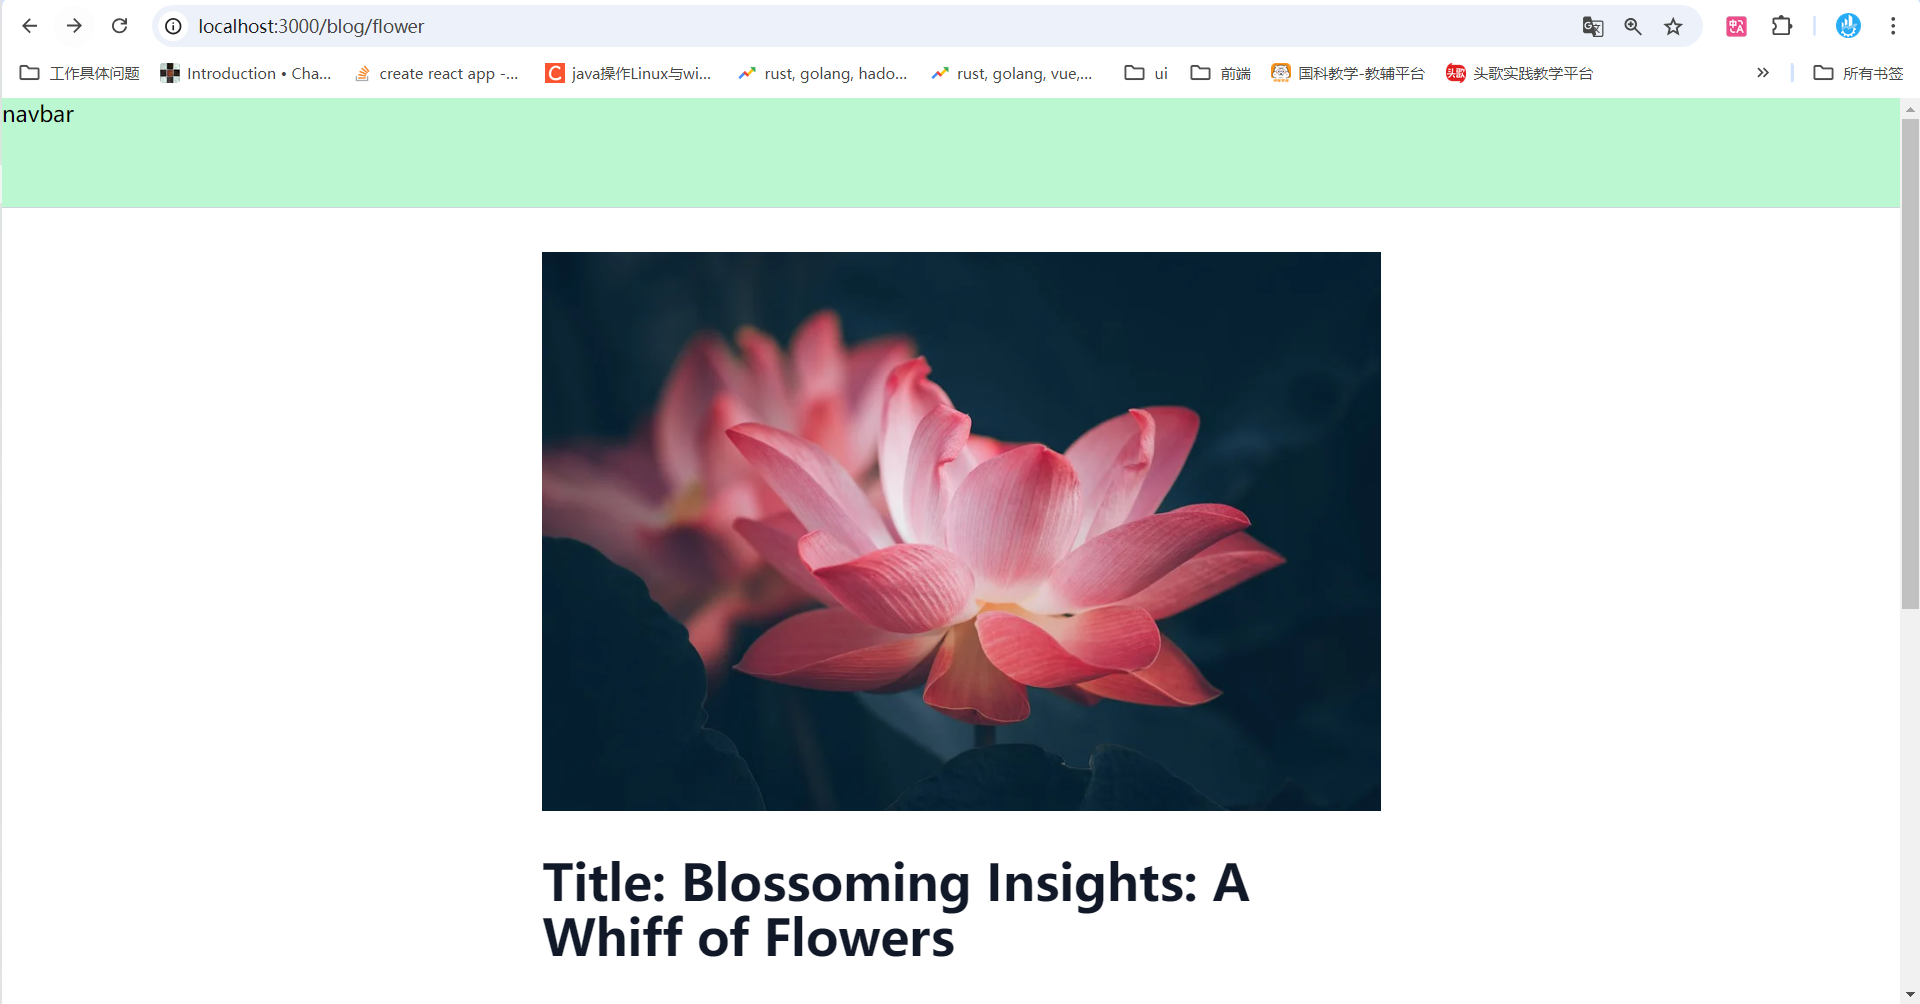
As I meandered through the garden, the air was thick with the sweet perfume of blooming flowers. Each petal, a tender
brushstroke on nature's canvas, painted a picture of grace and resilience. The flowers, in their silent language, spoke
of beauty that survives amidst the harshest conditions.

A delicate rose, its petals softer than silk, nodded gently in the breeze. It reminded me that even the most stunning
forms can emerge from thorny paths. In the blossoms, I saw a reflection of life's inherent beauty and the fortitude to
flourish despite challenges.

The garden, with its kaleidoscope of colors, became a sanctuary where every flower told a story of transformation and
growth. My spirits were lifted by this quiet symphony of scents and hues, a testament to nature's power to inspire and
replenish the soul.

(_create by AI_)
bird.md
1
2
3
4
5
6
7
8
9
10
11
12
13
14
15
16
17
18
![](https://cdn.pixabay.com/photo/2024/01/19/18/08/bird-8519547_1280.jpg)

# Title: Capturing the Charm of Feathered Friends

Today's venture into the serene woods was a delightful encounter with nature's delicate treasures. As I wandered through
the dappled sunlight under the canopy, my camera was my faithful companion, ready to freeze moments in time.

A soft trill caught my attention, leading me to a vibrant avian presence. A tiny bird, with feathers arrayed in hues of
blue and green, perched gracefully on a branch. It seemed almost aware of its own charm, bobbing and turning, as if
posing for an unseen audience.

I snapped a sequence of shots, each click capturing a different angle of this natural splendor. The bird, in its
innocence, carried on with its song, unaware of the beauty it bestowed upon my day.

As I left the woods, my heart felt lighter, and my camera held a piece of joy that I will cherish. These moments of
connection with nature are what truly nourish the soul.

(_create by AI_)

ファイルを読み取り表示する

Markdownを解析するための依存関係をインストールします。

1
2
3
npm i marked
# or
pnpm i marked

コードからファイルを読み取り解析します。

jsx
1
2
3
4
5
6
7
8
9
10
11
12
13
14
15
16
17
18
19
20
21
22
// app/blog/[slug]/page.tsx

import {readFile} from "node:fs/promises";
import {marked} from "marked";

// サーバーサイドコンポーネントは asyncを使用できます
export default async function BlogPage({
params,
searchParams,
}: {
params: { slug: string } // URLパラメータを受け取る (/blog/[slug] -> slug)
searchParams: {}
}) {
const text = await readFile(`./contents/${params.slug}.md`, 'utf8')
const html = marked(text)

return (
<div>
<div dangerouslySetInnerHTML={{__html: html}}></div>
</div>
)
}

よいです、今私たちはmarkdownテキストをページへの解析レンダリングに成功しました!

効果:

文字スタイルの問題を解決する

あなたはおそらく気づいています、私たちの見出しスタイルと普通のテキストが同じです。これはtailwindcssがデフォルトのCSSスタイルをクリアーしたためです。私たちはライブラリを使用してこの問題を解決できます。

1
2
3
npm i -save-dev @tailwindcss/typography
# or
pnpm i -save-dev @tailwindcss/typography

Tailwind CSSプラグインとして登録する

1
2
3
4
5
6
7
8
// tailwind.config.ts
const config: Config = {
/// ...
plugins: [
require('@tailwindcss/typography')
],
};
export default config;

そしてコンポーネントにproseクラス名を追加します。

jsx
1
2
3
4
5
6
7
8
9
10
11
12
13
14
15
16
17
18
19
20
21
22
23
// app/blog/[slug]/page.tsx

import {readFile} from "node:fs/promises";
import {marked} from "marked";

export default async function BlogPage({
params,
searchParams,
}: {
params: { slug: string } // 接收url参数: (/blog/[slug] -> slug)
searchParams: {}
}) {
const text = await readFile(`./contents/${params.slug}.md`, 'utf8')
const html = marked(text)

return (
// flex flex-row justify-center -> 内容居中
<div className={'w-screen flex flex-row justify-center'}>
{/* proseにより、テキスト中の見出しに対応するスタイルが与えられます。 */}
<div className={'prose'} dangerouslySetInnerHTML={{__html: html}}></div>
</div>
)
}

サービスを再起動し、ページを再度訪問します。

機能2: APIインターフェイスの提供

Next.jsはapiディレクトリ下のファイルをバックエンドインターフェイスとして解析するため、HTTPリクエストを受け入れて処理を行います。

私たちはMarkdownファイルの読み取りと解析操作をバックエンド(apiディレクトリ)に移し、レンダリング操作をフロントエンド(appディレクトリ)に残します。

試してみましょう

ディレクトリ構造を変更しましょう。

1
2
3
4
5
- app
+ api
+ blogs
+ [slug]
+ route.ts

この時点でのファイルシステムとURLの対応関係は

1
app/api/blogs/[slug]/route.ts -> site.example.com/api/blogs/a, site.example.com/api/blogs/b, ...

リクエストを処理するコードを書きます。

1
2
3
4
5
6
7
8
9
10
11
12
13
14
15
16
17
18
19
20
21
22
23
24
25
26
27
28
29
30
31
32
33
// api/blogs/route.ts

import {NextRequest, NextResponse} from "next/server";
import {readFile} from "node:fs/promises";
import {marked} from "marked";

// 接收GET请求
export async function GET(req: NextRequest) {
// 解析url
let slug = req.url.slice(
req.url.lastIndexOf('/') + 1,
req.url.length
)

let html
try {
// 读取md文件
const text = await readFile(`./contents/${slug}.md`, 'utf8')
html = marked(text)
} catch (err) {
console.error(err)
// 错误返回
return NextResponse.json({error: err})
}

// 返回html内容
return NextResponse.json({html})
}

// 接收POST请求
export async function POST(req: NextRequest) {
return NextResponse.json({})
}

結果を見てください:

存在しないmdファイルにアクセス
存在しないmdファイルにアクセス
通常のファイルにアクセス
通常のファイルにアクセス

フロントエンドからバックエンドデータをリクエスト

jsx
1
2
3
4
5
6
7
8
9
10
11
12
13
14
15
16
17
18
19
20
21
22
23
24
25
26
27
28
29
// app/blog/[slug]/page.tsx

// 服务端组件可以使用async
export default async function BlogPage({
params,
searchParams,
}: {
params: { slug: string } // 接收url参数: (/blog/[slug] -> slug)
searchParams: {}
}) {
// 请求后端数据
let res = await fetch(`http://localhost:3000/api/blogs/${params.slug}`, {
method: "GET"
})
let json = await res.json()
let html
if (json.error)
html = "Ooh! Something went wrong"
else
html = json.html

return (
// flex flex-row justify-center -> 内容居中
<div className={'w-screen flex flex-row justify-center'}>
{/* prose让文本中的标题有对应的样式 */}
<div className={'prose'} dangerouslySetInnerHTML={{__html: html}}></div>
</div>
)
}

結果:

通常のアクセス
通常のアクセス
存在しないmdファイルにアクセス
存在しないmdファイルにアクセス

ここまで、私たちは一旦おさらぐことにします。長い文章を防ぎ、他の内容を別の篇章にまきましており、下のリンクをクリックすることができます。

次のステップ

next-themesを使用して日夜テーマを切替える

他人のウェブサイトが明るいテーマと暗いテーマを切り替えることがあっただろうか、私たちも実現することができます。

prismaを使用してデータベースに接続する

ファイルシステムやキャッシュシステムを介してデータを保管するのが一種の選択肢ですが、より一般的に使用されるのはデータベースです。

next-authを使用して認証を行う

アプリケーションの一般的な機能として、next-authを使用することでログインと登録ページを自分で作成する必要がなくなり、認証ロジックの実現に専念することができます。

tiptapを使用してリッチテキストエディタとする

tiptapは現代的なヘッドレスリッチテキストエディタであり、私たちは魅力のあるページコンテンツを簡単に書くことができます。

コードを通じてtiptapをカスタマイズする方法は?最新の記事をチェックアウトしてください(todo)


本站总访问量